Natural dyeing with food waste is a beautiful way to reconnect with traditional textile practices while embracing sustainability. This process transforms everyday kitchen scraps into vibrant, non-toxic dyes that can be used to color natural fabrics. It’s a creative, eco-conscious practice that reduces waste and produces stunning, earthy tones. In this detailed guide, we will explore how food waste can be used for natural dyeing, the types of food scraps that work well, the dyeing process, and tips for success.
Why Choose Natural Dyes from Food Waste?
The textile industry is one of the largest polluters globally, and synthetic dyes are a major contributor. These dyes often contain harmful chemicals that contaminate water sources and pose health risks to workers. Natural dyeing, especially using food waste, offers a cleaner, safer alternative. It’s not only environmentally friendly but also an excellent way to give a second life to kitchen scraps.
By using food waste, you’re:
- Reducing landfill contributions
- Avoiding toxic chemicals
- Embracing traditional craft methods
- Creating one-of-a-kind, naturally colored fabrics
Types of Food Waste for Natural Dyeing
Not all food waste will produce color, but many common kitchen scraps do. Here are some of the most effective and accessible options:
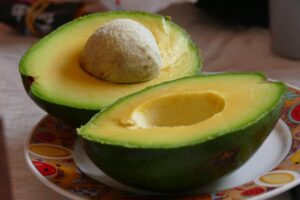
Avocado Pits and Skins: Surprisingly, these yield shades of pink to peachy rose. The tannins in the pits help bind the dye to fabric.
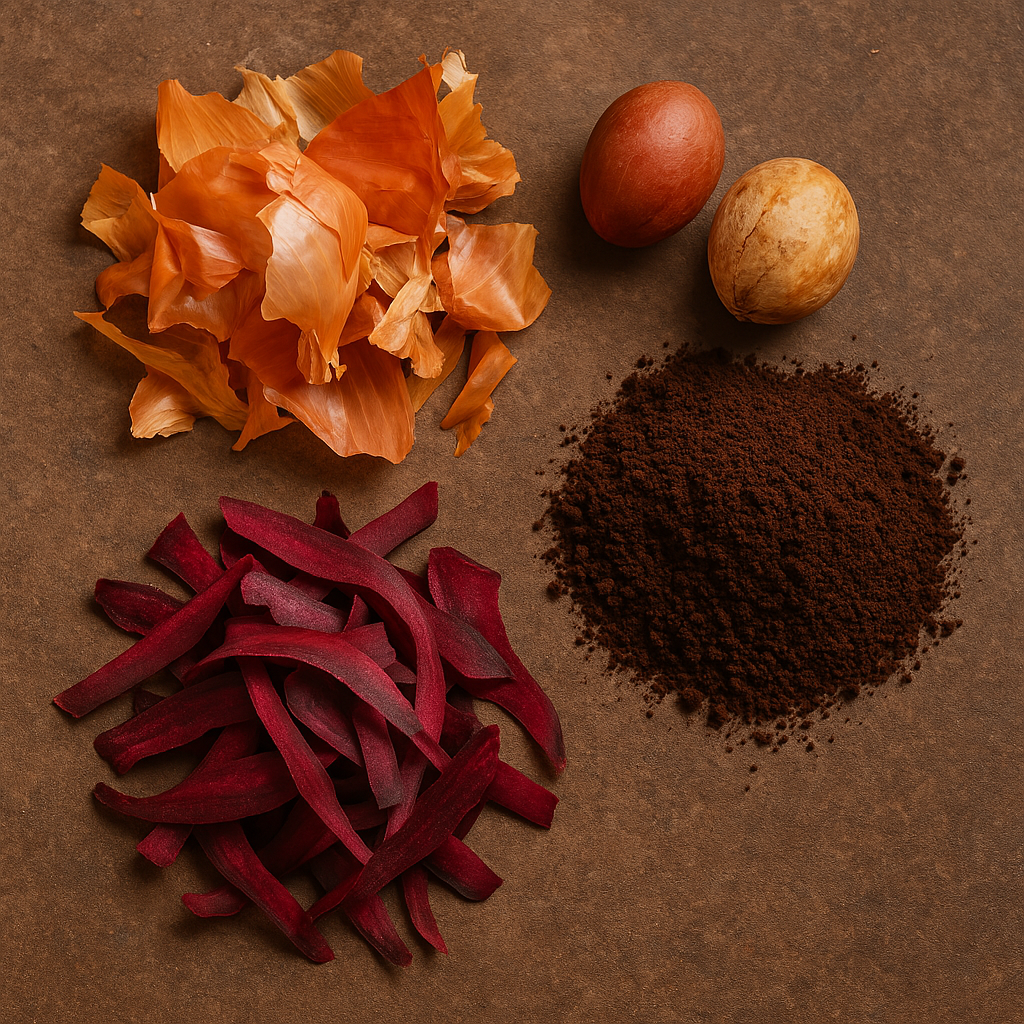
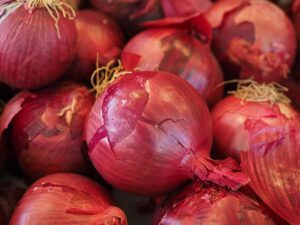
Onion Skins: Yellow onion skins produce rich golden to rust-orange tones, while red onion skins can yield anything from green to brown depending on mordants and fabric.
Red Cabbage: Highly pH-sensitive, red cabbage can produce purple, blue, or even green tones. Adding vinegar shifts it toward pink; baking soda turns it blue-green.
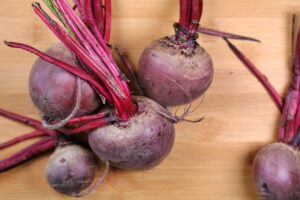
Beet Peels: These can create a soft pink, though they tend to fade quickly unless fixed properly.
Coffee Grounds and Tea Leaves: These offer shades of brown and tan, and are a great choice for subtle, vintage-like colors.

Carrot Tops and Spinach Leaves: While more subtle, these greens can still give pale yellow to greenish hues.
Pomegranate Rinds: High in tannins, they produce yellow to olive tones and don’t require mordants.

Preparing Your Fabric
Before dyeing, your fabric must be clean and mordanted. It will help penetrate the color to the fibers.
- Scouring the Fabric: Wash the fabric thoroughly with a gentle detergent to remove any oils or finishes. This is essential for even dyeing.
- Mordanting: Use alum (aluminum potassium sulfate) for most natural dyeing. Dissolve 10–15% of the fabric’s weight in water and simmer the fabric in this solution for one hour. Let it cool and sit overnight if possible, then rinse lightly.
Note: Some food waste like avocado pits and pomegranate peels have enough natural tannins to bind without a mordant, especially on protein fibers like wool and silk.
Making Your Dye Bath
- Collecting Food Waste: Store scraps in the freezer until you have enough. Aim for at least a few handfuls of material per batch.
- Simmering: Place your food waste in a stainless steel or enamel pot (avoid aluminum or iron unless you want to alter the color). Fill upr with water and simmer gently for 1–2 hours.
- Straining: After simmering, strain out the solids to avoid uneven dye spots. The remaining liquid is your dye bath.
Dyeing the Fabric
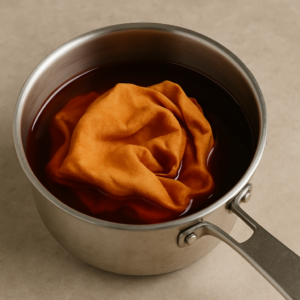
Add Fabric to the Dye Bath: Place your pre-wet, mordanted fabric into the dye bath. Make sure it’s fully submerged.
Heat Gently: Simmer gently for 30 minutes to an hour. Stir occasionally to ensure even exposure.
Soak: After simmering, let the fabric soak in the dye bath for several hours or overnight. This deepens the color.
Rinse and Dry: Wash the dyed fabric with cold water until it clears. Hang to dry away from direct sunlight to preserve color.
Tips and Tricks for Success
- Use Natural Fibers: Cotton, linen, silk, and wool absorb natural dyes best. Synthetic fabrics won’t take up color well.
- Test First: Always do a small test swatch before committing a full piece.
- Experiment with pH: Try adding vinegar or baking soda to shift colors, especially with cabbage or berry-based dyes.
- Keep a Journal: Note what you used, how long you soaked, and the results. This helps replicate success.
- Layer Dyes: Try overdyeing with different waste materials for complex shades.
Sustainability and Artistry Combined
Using food waste for dyeing is more than just a craft — it’s a way of thinking. It encourages mindfulness about consumption and waste, and it connects us to nature and tradition. Each dye bath is a small experiment, with unique results that reflect the season, the food, and your own hand in the process.
This practice is also an excellent educational tool for teaching about sustainability, chemistry, and cultural history. It can be done at home, in schools, or in community workshops, turning what would have been garbage into vibrant, meaningful art.
Whether you’re looking to refresh old clothing, create handcrafted gifts, or simply explore natural color, dyeing with food waste is an accessible, rewarding journey.
So the next time you peel an onion, slice an avocado, or brew a pot of tea — consider saving those scraps. You might just be holding the ingredients for your next masterpiece.
Natural dyeing with food waste brings together sustainability, creativity, and tradition. It’s a chance to slow down, experiment, and discover the beauty hidden in everyday materials. With patience and curiosity, your kitchen waste can become a canvas of rich, living color.